

When it comes to water efficiency, showerheads are one of the biggest culprits with the flow restrictor in the head being a device that reduces water flow. This helps reduce the amount of water used by showering, but also reduces the amount of shower pressure on your shower head. If you want to get rid of yours, here’s how to remove a shower head flow restrictor.
Contents
- 1 What Is A Shower Head Water Restrictor?
- 2 How Does It Work?
- 3 What Does a Flow Restrictor Look Like?
- 4 What Are the Types of Shower Heads that Have Restrictors In Them?
- 5 Tools Required to Remove a Water Flow Restrictor
- 6 Tasks Required Before Removing the Flow Restrictor
- 7 How to Remove Flow Restrictor from Handheld Shower Head
- 8 How to Remove a Flow Restrictor from an Embedded Shower Head
- 9 How to Remove a Flow Restrictor from a Moen Shower Head
- 10 How to Remove the Flow Restrictor in a Waterpik Shower head
- 11 How to Remove the Flow Restrictor from a Peerless Shower head
- 12 How to Remove a Flow Restrictor (Delta Shower head)
- 13 Frequently Asked Questions
- 13.1 Will replacing a water flow restrictor with a new one improve the water pressure?
- 13.2 How frequent should you replace your water flow restrictor?
- 13.3 Can you improve the water pressure without taking out the water flow restrictor?
- 13.4 What are the drawbacks of taking out the water flow restrictor?
- 13.5 What are the pros of using a water flow restrictor?
- 13.6 Do all shower heads come with flow restrictors?
What Is A Shower Head Water Restrictor?
A shower head water restrictor is also known as a flow limiter or flow regulator. These plastic devices are engineered to limit the amount of water that flows through your showerhead, hence the name.
Different flow restrictors will come in different colors. The material used to make shower head water restrictors can endure high water temperatures. They are also easy to replace or remove.

Most showerheads out there come with a flow restrictor that precludes your faucet from generating more than two and half gallons of flow rate per minute.
How Does It Work?
Shower head water restrictors work by limiting the amount of water your showerhead can produce. The reduced flow is because of the unique shape that obstructs the center of the fitting, enabling small amounts of water to escape around the edges.
Without this device, there’s nothing to regulate the pressure or amount of water except the size of the tap valve, producing more wasted water.

When there’s a shower head flow restrictor in place, the piece blocks some of the water, so not as much comes out at the same time, resulting in less wasted water and low water pressure.
What Does a Flow Restrictor Look Like?
A shower head flow restrictor is typically plastic, and is circular, flat, and has a star-shaped metal center. It is normally located behind the metal screw-off part in a fixed shower head. Shower head flow restrictors can differ in color and have open inserts close to their edge.

In a handheld showerhead, the flow restrictor can be found at the edge of the handle where it connects to the flexible hose, inside the bottom or top of the hose, or behind the shower head. Your manufacturer’s shower manual can tell you where to locate it.
There are some flow restrictors that are metal discs with a hole in the middle filling the pipe and obstructing most of the water flow.
What Are the Types of Shower Heads that Have Restrictors In Them?
Embedded Shower Head
Embedded shower heads are the most common type of shower head. They are normally ergonomic, and cost-efficient because they are easy to maintain. If you don’t have much budget to spend, then an embedded shower head is for you.

It lowers the hassle of maintenance, and you can purchase one online too. If you’re searching for a more premium experience, you can pick one that features multi-function. This will let you change the pattern of water spray to your liking.
An embedded shower head normally has a maximum size of five inches. Even though you can change its spray’s direction, you won’t be able to adjust the height of the showerhead because it is fixed on your wall.

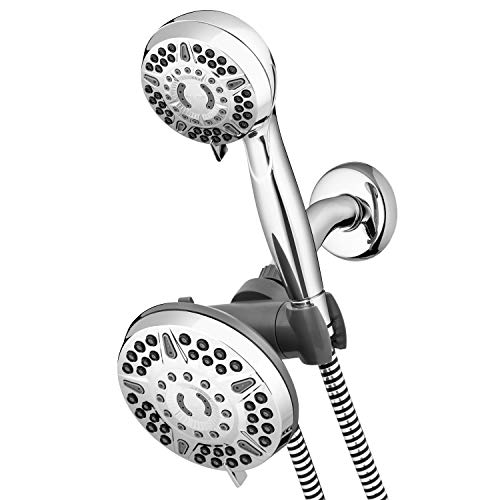
Handheld Shower Head
Are you tired of adjusting shower head to wash away all traces of shower gel or shampoo? Then try a handheld shower head because it is affordable, easy to use, and more flexible. It’s also quite handy if you need to wash your pets or give your children a bath.
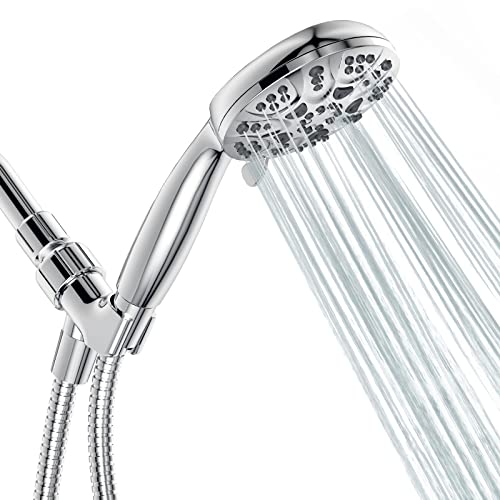
They normally come with a wall mount and a flexible hose of metal or plastic. It’s also cost-effective because metal hoses are sturdy, and you can also purchase the showerhead if you already have the hose and mount at home.
Moen Shower Head
For more than eight decades, Moen has been dedicated to crafting products that you can depend on for a lifetime. Moen offers a vast range of finishes to select from: bolder, warm nickels, subtle, classic chrome, antiqued bronzes, rich, and modern finishes such as gold and black.

Moen Modern Shower Heads give you modern innovations and styles. And with purposeful innovations such as effortless docking with Magnetix or the best rainshower experience possible with their Immersion technology, you’ll love Moen Showerheads.
Complete your bathroom with Moen Showerheads that usually come with a six-function dial hand-held showerhead in chrome. Moen showerheads normally feature an innovative magnetic docking system that makes using the showerhead easy. Some Moen chrome showerheads are functional and attractive.

They come with a rotating dial that enables you to choose between three massage types, wide coverage, rinse, and downpour modes, as well as a generous, tangle-free metal hose that makes it effortless to take care of bathing your pets and kids. Moen showerheads are perfect to complement your stylish bath hardware, especially heir Moen Handheld Shower Head.
Their types of showerheads include:
- Slide Bar
- Shower Arm Flange
- Standard with Handheld
- Rainshower
- Fixed
- Handheld
WaterPik Shower Head
WaterPik Showerheads are best-in-class when it comes to innovation. Since the launch of their original shower massage way back in 1974, WaterPik has pursued a tradition of performance and innovation, especially in their showerheads.
Waterpik designs their showerheads to create shower experiences that rejuvenate, refresh, and relax. Their showerheads have patented PowerPulse Massage technology that gives deep massaging action and up to two times the massage force for a reinvigorating and rejuvenating therapeutic shower experience.
Moreover, their showerheads’ PowerPulse Therapeutic Strength Massage aids to promote restful sleep, increase flexibility, as well as to soothe muscle tension.
Their types of showerheads include:
- Pet Wand
- Shower Wand
- Dual Shower
- Rain Shower
- Fixed Mount
- Hand Held
Delta Shower Head
Delta offers a selection of hand showers and showerheads available in different styles and finishes. This selection features a range of innovations to reflect your shower preferences and personal style.

Their showerheads are water savers and are incorporated with temperature control. Whether you’re more interested in rain shower heads or searching for a showerhead that offers massage, you’ll be able to find what you’re looking for.
Delta showerheads only come in two types:
- Embedded Showers
- Two-in-One Shower Heads
But have many finishes such as: Chrome, Lumicoat, Stainless, Spotshield Brushed Nickel, Black Stainless, Polished Nickel, Champagne Bronze, Matte Black, and White.
Delta also offers kitchen faucets and shower screens just in case you’re interested. They also have aerators and bathroom faucets.
Peerless Shower Head
Personalize your shower experience with stylish and affordable Peerless shower heads to fit your desired bathroom needs.

Personal shower heads are water-efficient and ADA compliant. Most Peerless shower heads feature multi-setting that will surely meet your personal needs and design preferences. Their showerhead finishes are Chrome, Brushed Nickel, Satin Nickel, and Matte Black. Also, Peerless offers water heaters just in case you need one.
Tools Required to Remove a Water Flow Restrictor
Before you remove shower head flow restrictor, make sure you have the following tools in place:
- Flat head screwdriver
- A Teflon tape/plumbers tape
- Needle nose pliers
- Paper clips
- Cloth or tower
- Adjustable wrench or pipe wrench
Tasks Required Before Removing the Flow Restrictor
- When picking the wrench you’ll use to hold the connector bent pipe and the showerhead, opt for the lightweight option because it will give you a good hold.
- Before settling on the screwdriver, check out its top part. Is it adjustable? If it is, then you’ve got the correct screwdriver.
- Get a partner that can help you throughout the process. You need to be careful so a second person can help you with task of removing the water flow restrictor.
Stop The Shower Tap
Also, make sure to stop the water flow through the shower tap before starting the process.
How to Remove Flow Restrictor from Handheld Shower Head
A lot of houses have handheld shower heads. To remove a flow restrictor from handheld shower head, just follow the steps below.
Step 1 – Locate the Flow Restrictor: Search for the water restrictor on the handheld shower by looking on the manufacturer’s website or the owner’s manual.
Normally, the flow restrictor can be located inside the holder connected to the end of the handle that links to the flexible tubing, or to the shower arm. But keep in mind that the position of the restrictor normally depends on the brand.

Step 2 – Take Out the Flow Restrictor: If you’ve got a product with its showerhead at the bottom of the handle, safeguard the connector nut using a clean rag. Tightly hold the covered nut using adjustable pliers and rotate counterclockwise to remove the handle from the tubing.
Take out the washer of the handle and filter screen using needle nose pliers. Then remove the exposed restrictor using a flat head screwdriver.
Now, if you’ve got a showerhead with a restrictor inside the holder, safeguard the shower arm and connector using a clean rag. Then tightly hold the arm using a pipe wrench while using adjustable pliers to hold the nut.
Rotate the nut clockwise until the holders drop from the shower arm. Now, move to the end of the holder, then remove the filter screen and washer using a needle nose plier. Finally, take out the restrictor using a flat head screwdriver.
Step 3 – Setup the Showerhead: Return the washer and filter screen to their previous spots on the fixture. Make sure you push in the washer using your fingers. Remove any previous Teflon tape which forms the linear grooves on the shower arm or flexible tubing.
Get a Teflon tape and cover the threads with a new one. Tighten the connector using your hands and wrap the nut using a rag. Lastly, secure the nut with another quarter turn using an adjustable wrench.
How to Remove a Flow Restrictor from an Embedded Shower Head
Just like handheld shower heads, an embedded shower head is also a popular type of shower head. The steps below should help you remove a flow restrictor from an embedded shower head in few minutes.
Step 1 – Take Out the Head: Find the shower arm or bent pipe and connector nut that sticks out of the bathroom wall. Wrap both components using a clean rag to protect them from getting scratched.
Firmly hold the arm using a pipe wrench and loosen the connector nut using an adjustable wrench. Loosen the connector nut until the head is removed from the shower arm.
Step 2 – Remove the Restrictor: Search for the washer inside the connector nut. Typically, both items need to be extracted before you can spot the restrictor.
Slowly pull out the washer using needle nose pliers. Take out the screen by tapping the bottom of the head using your palms. If the screen is stuck, you can use pliers to remove it.
Now take out the flow restrictor using a flat-head screwdriver. Just for reference, a restrictor looks like a plastic disk in any of the following colors: red, pink, green, and white.
Step 3 – Setup the Showerhead: Then return the screen to its previous spot. Fix the washer and push it using your fingers so it won’t fall off. Remove the existing Teflon tape from the linear grooves on the shower arm. Then wrap a new Teflon tape around the threads in a clockwise direction.
Fasten the connector nut by tightening it using your hands. After the nut is firmly positioned, wrap a rag around the arm and nut, then grab the arm using a pipe wrench. Grab the adjustable wrench to turn the nut.
How to Remove a Flow Restrictor from a Moen Shower Head
If you’re using a Moen showerhead, here’s how to remove a flow restrictor from it.
Step 1 – Remove the Showerhead: Wrap the showerhead using a clean rag and remove it using an adjustable wrench. Hold the shower pipe, which is the part closest to the bathroom wall with your free hand, and rotate the showerhead connector using an adjustable wrench.
Step 2 – Disassemble the Fitting: Pull out the rubber O-ring gasket using your hands to preclude potential damage to the delicate component. Then grab the showerhead and shake it slowly to take out the screen.
Step 3 – Search for the Flow Restrictor: Look at the neck of the showerhead and search for the flow restrictor.
Step 4 – Remove the Flow Restrictor: Slowly pull out the water restrictor from the neck of the showerhead. Make sure you only put minimal pressure when handling the inner thread of the fixture to avoid damage.
Step 5 – Reassemble the Components: Return the screen to the showerhead and fix the O-ring on it. Be sure to keep this assembly secure and tight.
Firmly wrap the new plumber tape around your showerhead. Then, tightly fix the Moen Shower Head back to the shower arm using your hands. Lastly, wrap the rag around the shower arm and secure the connections using an adjustable wrench.
Tip: Always make sure that you close or drain the bathroom showerhead of the water supply before working on it!
How to Remove the Flow Restrictor in a Waterpik Shower head
Just like the showerheads on this post, the Waterpik Shower Head also uses a flow restrictor to preclude wastage and ultimately pay smaller utility bills.
But its restrictor can disturb the shower spray, turning it to an irritating wear tickle. If you want to enjoy a strong flow, particularly when turning on the shower restrictor valve, you must remove the water restrictor with the steps below:
Step 1 – Take Out the Shower Head: Remove the Waterpik Shower Head from the pipe that extends from wall. To execute this, use a crescent wrench but make sure that the showerhead is covered with a rag to prevent scratches.
Step 2 – Remove the Washer: Search for the black rubber washer on the showerhead and remove it. You can spot it between the shower arm and the showerhead.
Step 3 – Remove the Flow Restrictor: With a Phillips screwdriver, extract the flow restrictor from the star-shaped hole in the spray nozzle until it is loose.
Step 4 – Safeguard the Shower Arm: Wrap the threads on the arm using plumber tape. With this tape, you’ll be able to safeguard the threads from corrosion and rust after attaching the showerhead to it.
Step 5 – Reassemble and Reinstall the Waterpik Shower Head: Return the rubber gasket and screens to their previous spots on the shower arm. Connect and tighten the showerhead on the shower arm by using a crescent wrench.
Tip: Always cover the showerhead with a rag when using a wrench on it!
How to Remove the Flow Restrictor from a Peerless Shower head
Now, if you have a Peerless Shower Head and want to improve its flow by removing its flow restrictor, here’s how to do it.
Step 1 – Dismantle the Components: Get to the pipe end of the Peerless Showerhead and slowly remove the filter screen and rubber gasket using a flat screwdriver. Clean any mineral or dirt that has accumulated on the screen.
Step 2 – Loosen and Take Out the Flow Restrictor: Now, insert the screwdriver into the showerhead’s pipe end. Then, press the screwdriver on one edge of the plastic water restrictor. Place the screwdriver under the flow restrictor and extract slowly to remove it from the opening.
Step 3 – Reassemble and Put Back the Showerhead to Its Original Position: Replaced all the removed components I’ve mentioned above to their original spots. Then, reassemble the Peerless Shower Head.
Tip: If your showerhead doesn’t feature a water restrictor, then no need to execute any of the steps above because some units don’t really have one.
How to Remove a Flow Restrictor (Delta Shower head)
Delta Shower Heads also utilize flow restrictors. So, if you’re using one and want to remove its flow restrictor as well, just follow the steps below.
Step 1 – Safeguard the Connector: First of all, you need to cover the chrome connector at the location where the showerhead extends from the wall using a clean fabric. The cloth will prevent damage to your showerhead.
Step 2 – Unscrew the Delta Shower Head: Secure an adjustable wrench over the covered connector and unfasten the showerhead using a wrench and remove the fixture from the pipe.
Step 3 – Pull Out the Washer: Delicately extract the washer from the showerhead’s threaded coupler. Be sure you use a pair of needle-nose pliers for this step.
Step 4 – Take Out the Flow Restrictor: Tightly hold the opaque nylon flow restrictor under the washer using a needle-nose plier, and extract it from the showerhead.
Step 5 – Reassemble and Put Back the Delta Showerhead to Its Original Position: Put back the washer to its original spot on the Delta connector. Press the item using your thumb to secure it. Replace the Delta coupler on the pipe and fasten it down using an adjustable wrench to fix the connection.
Frequently Asked Questions
Will replacing a water flow restrictor with a new one improve the water pressure?
Most of the time, yes, because the purpose of the water flow restrictor is to make sure water comes out of your shower head with the right pressure.
How frequent should you replace your water flow restrictor?
How often you should replace your water flow restrictor will depend on a few factors such as:
- Whether you love high-pressure water since water flow restrictor normally increases water pressure, which ultimately means less changing of the water flow restrictor.
- How much are you using your shower head. If you’re always using it, then most likely, you’re going to replace it frequently.
- The type of water in your location. If you have a salty water supply around your area, then expect a clogged shower head compared to when you have a fresh water supply. Because clogging damages the restrictor in the process, you will need to replace it from time to time.
Can you improve the water pressure without taking out the water flow restrictor?
Of course, you can, but you’ll need an adjustable shower head for this to happen. If you have an adjustable shower head, just set it to your preferred water pressure or flow. Now, if an adjustable shower head is not an option, then just make sure that your shower head is not clogged because of hard water.
What are the drawbacks of taking out the water flow restrictor?
The only drawback is that you won’t be able to conserve water, and along with it, your utility bill will most likely increase.
What are the pros of using a water flow restrictor?
Water flow restrictors can help you save some money by lowering your water usage. Aside from that, some latest showerhead units are designed in a way that enables your water flow restrictor to provide the correct amount of water pressure. In short, you can easily control the water pressure.
Do all shower heads come with flow restrictors?
Not all showerheads are incorporated with a water flow restrictor. But the latest shower head models are built with one because the National Energy Act orders every manufacturer to incorporate a removable water flow restrictor in their showerheads.
Last update on 2022-10-30 / Affiliate links / Images from Amazon Product Advertising API