
In this article we will know how to replace a shower faucet single handle and how does it work . Many owners decided to replace the old one-hand shower valve, demolish the brick wall during the transformation of the shower, after finding a pathological green corrosion covering the body and the copper pipe attached to the body.
[wp_ad_camp_1]
No one wants to spend money and time replacing wall bricks only with a spring of filtered water pipe on the road for a few months.
Although often left to a professional plumber, many DIY home owners complete the project in a few hours without any problems.
Repair of shower valves sometimes makes sense.
Shower valves that drip water out of the nozzle of the bathroom usually need to replace the cartridge.
Many single-handle shower valve models use fixing nuts to secure the cartridge in place.
Simply remove the fixing nuts and remove the old cartridge with pliers.
Fixed brass pin on top of valve body to secure a single handle Moen cartridge.
Hold the fixed pin with a set of pliers and remove it from the valve body, careful not to fall into the wall cavity.
Pull the cartridge with the Morne cartridge removal tool.
Lubricate the cartridge O-ring with a small amount of plumber grease and push toward the shower valve.
Contents
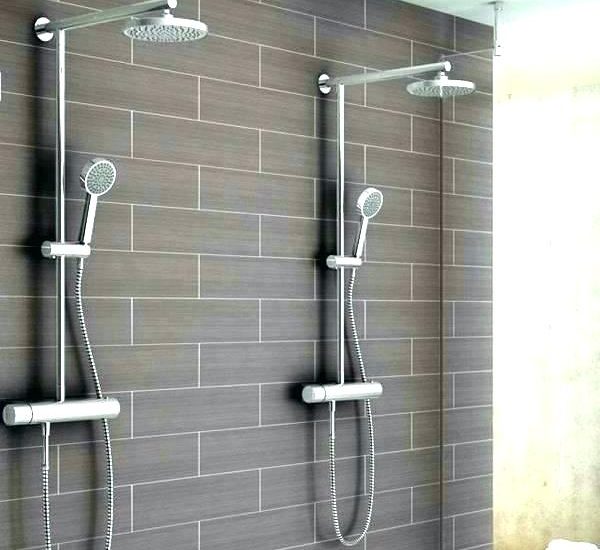
How the shower valve works
The cold water pipe is connected to the left side of the valve, and the warm water pipe is connected to the right.
The top port sends water to the shower head, and the bottom port, if applicable, feeds the bath separator or nozzle.
Only the shower valve has three ports: left, right and top.
When using a 4-port valve in shower only applications, the plumber’s junction covers the bottom port.
The valve cartridge controls the flow of water through the system.
The scalding device automatically changes the ratio of cold and cold water to prevent users from burning dangerous hot water.
How To Replace Shower Faucet And Remove the Old One?
Steps 1
– Turn off the water to the source of the house.
– If the house uses a well pump, turn off the pump motor switch.
– If the building is connected to local water, turn off the main valve of the water supply system.
– Open the existing single-handle shower valve.
-This releases any water pressure in the pipe.
– Find the fixing screws for the shower knob, which can be found under the decorative cap or exposed under the handle.
– Use the appropriate tools to release the fixing screws, usually Phillips screwdriver or hex wrench.
– Pull the knob down the shower valve.
– Remove the trim plate screws and pull the wall tile plate to expose the old valve body.
If the old dots block the plate, use a screwdriver to separate the trimming board from the tile.
– Look at the bottom of the bath nozzle to determine its method of removal.
– Some bathtubs spray threads on pipes with male threads, while others are fixed in place with clamps to hold the pipe.
– The clamp bath nozzle removes the camp using small holes under the nozzle.
– Slide the appropriate tool (usually Phillips screwdriver or hex wrench) into the hole and release the clip.
Steps 2
– Take the mouth of the bath from the pipe.
– The nozzle for the bath without a channel hole is rotated over the threaded pipe.
– Hold the mouth of the bath and turn counterclockwise.
– Corrosion usually blocks threads together and requires pliers to separate.
– Hold the shower arm with a pliers and turn the shower head counterclockwise.
– Fix the dripping shower head and slide the shower arm shield.
– Unscrew the shower arm from the threaded elbow located inside the wall, using pliers as a lever.
– During complete renovation, contractors often remove everything from the wall, leaving only completely exposed pipes and cables.
– Smaller works may only need to replace a few wall tiles.
– When trying to save the tile, consider opening the wall on the other side as a shower valve.
– Openings in the plasterboard of the cabinet sometimes make an easily repaired access point.

Steps 3
– Remove the part of the wall necessary to expose valves and pipes.
– Note the route of the water pipe and any obstacles on the road.
– The new valve is connected in the same way as all pipes.
– Look for leaky pipes and signs of water damage.
– If there are no signs of leaks in the pipes, but the wall bolts are damaged near the floor,
– check the drainage system of the bath or shower.
– Gasket of the template for the bathroom, that is, the spacer between the bottom of the bath and the drain, often deteriorates over time.
– Cut the hot and cold water pipes, as well as the pipes to the shower arm.
– Cut more than one inch of any remaining fixture or blocker.
– Leaving more than a minimum of one inch makes it easy to repair connections.
– Use the right tools: the copper pipe cutter is fractional by copper pipe without deforming
– the pipe, while the ratchet cutter is carefully cut by plastic pipe.
– Release the clamps or screws to secure the valve to support the body horizontally.
– Remove the old valve from the wall cavity.
Installation of New Shower Valve
Steps 1
– Hold the new shower valve for the back support.
– Check its depth orientation, that is, a round plastic shield attached to the face of the valve, flush with the surface of the wall tile.
– Adjust the back support as needed.
– If the rear bracket is too far from the back, add the appropriate thickness gasket to the rear bracket.
– If the rear bracket is too far away, remove it and reattach it to the wall screws in the correct position.
– Usually hitting with a hammer to move the support is enough
– Remove the depth guide.
– Valves with threaded ports require less piping skills than welded ports.
– When using a valve with a threaded hole, simply cover the male thread with a threaded
– sealant and install the appropriate threaded pipe fittings on the valve body.
– If the body is welded directly to the copper pipe, remove the cartridge and use the torch to connect the short part of the pipe to the body.
– Install the new valve on the rear bracket.
– Clean the ends of the building water pipes using appropriate methods.
– Emory fabric removes corrosion from copper pipes, while chemical cleaners prepare plastic pipes for adhesive cement.
Steps 2
– Connect the coupling to the hot and cold water pipes of the building.
– Modern pipe fittings cost more than copper, CPVC or PEX pipes, but require less experience in pipes and tools.
– Push fittings are easy to move from rigid copper to flexible tubes like PEX.
– Copper fittings require flow, welding and torch.
– Special tools can be fixed to rings or clips on PEX and polyethylene pipe fittings.
– Pipes and fittings made of CPVC coated with the right cement.
– Direct the water pipes to your respective ports.
– The type and location of the fittings depends on the position of the valve in the wall.
– Install a lid on the bath bar and close the shower openings.
– Both ports use a 1/2 inch accessory.
– Open the shower valve for water supply and leak test of the building.
– Turn off the water and fix the leaks found.
– Replacement of the one-hand shower valve depth guide.
– Repair or installation of shower wall panels and tiles.
– Glue the tile to the depth rail.
Steps 3
-Connect the coupling to the hot and cold water pipes of the building.
– Modern pipe fittings cost more than copper, CPVC or PEX pipes, but require less experience in pipes and tools.
– Push fittings are easy to move from rigid copper to flexible tubes like PEX.
– Copper fittings require flow, welding and torch.
– Special tools can be fixed to rings or clips on PEX and polyethylene pipe fittings.
– Pipes and fittings made of CPVC coated with the right cement.
– Direct the water pipes to your respective ports.
– The type and location of the fittings depends on the position of the valve in the wall.
– This ensures that the trimmed package of the valve covers the opening of the wall cladding.
– Grout and cleaning of the shower wall.
– Check the method of installation of the new bath nozzle.
– A nozzle with a female thread requires a pipe ending with a male thread.
– Apply the threaded sealant to the male thread and tighten the nozzle for the bath.
– The nozzle with locking clip slides into the naked tube.
Steps 4
– Sealed connection O-ring.
– Tighten the clip to cover the wall tube of the shower head with a threaded sealant.
Installation of wall tubes and shower heads.
– Remove the depth guide.
– Install decorative bags and handles of shower valves according to the manufacturer’s instructions.
– Some installers place a small bead along the outer edge of the shield before sliding over the tiles.
– This helps to prevent moisture from entering the wall cavity.