
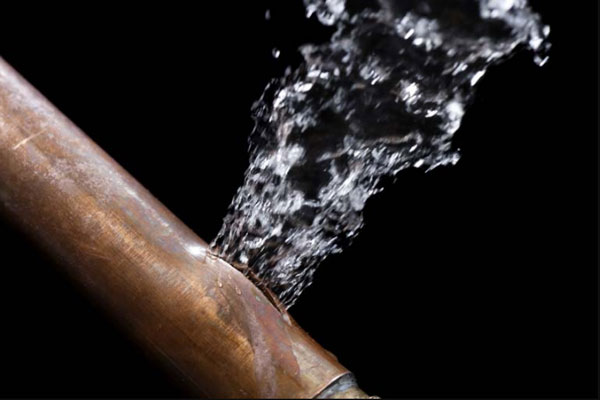
Having a leaking pipe in your home is always a headache. Its commonly suffered by most men, women and home owners without any discrimination. And knowing how to stop a leaking pipe with water properly will be one of the most important plumbing skills you’ll ever learn.
As you may know, this skill will definitely help you stop the leak in your burst pipe, or leaking shower head. The plumber arrives so that you can at least eliminate the cost. You are going to incur from the increased water bill and of course by damaging valuable furniture.
You May Like: Water Leaking In House When It Rains | How To Stop Leaking Under Wall
[wp_ad_camp_1]
BY : EDWIN
But our goal here is to learn how to stop a leaking pipe with water giving it. The permanent solution ourselves Instead of waiting for plumbers to visit us.
Whenever there is a water leak from a pipe it can be really messy. So the first thing you should do is shutting off the main water valve. Which is usually fixed near the water meter in your house to stop the situation from escalating into a bigger mess.
Contents
Example

Once the main valve is shut off, it’s actually a good idea to release or loosen the faucet socket. This will reduce the water pressure that’s been built up. Now you can leave the pipe for few minutes until the water pressure drops to a point. There will be no pressure and the water will eventually stop coming out of the leaking pipe.
As you can see, that wasn’t too hard and you didn’t have to ask someone else do that. But the main point here is not to freak out when you see. There is a cracked pipe with water gushing out on high pressure continuously.
How to stop a leaking pipe with water immediately with quick fixes
In this section let’s look at the short term solutions we can provide when there is a leaking pipe with water. Although these are going to be temporary fixes I must advise that you do not skip this part. Because before going for permanent solutions it is important that you do the basic stuff first.
First thing you can try is gluing it up with epoxy. But before you do that you need to wait until all the water has left the pipe. Make sure that the area is dry before using epoxy. You can also wipe the leaking pipe with cleaning rags. If you don’t want to wait until all the moisture is vaporized from the crack naturally.
Example

You can now start to knead the epoxy to make it turn into one color. Once it gets to one color, you are ready to place it onto the leaking area and just gently press it afterwards. Keep in mind to paste a considerable amount of epoxy so that the whole crack is entirely covered. This is actually the most widely used fix for most leaking pipes.
Now that you have located the crack in your pipe. Make sure that the pipe is fully dried out leaving no visible traces of water. We can wrap a large amount of duct tape around the crack itself as the second method. The start coiling the tape about a couple of inches before the crack is in order to fully cover the leak. And finish coiling the tape about a couple of inches after the crack as well for better support.
As you can understand, a lot of wrapping of this duct tape is required considering the water pressure it’s going to bear up later on. So, it’s also a good practice to wrap it a second time after the first duct tape coating is wrapped up making sure that there are no loop holes for water to creep out.
Example

As I mentioned earlier, the methods mentioned above will show you how to stop a leaking pipe with water for a few days only. Therefore, it is really important that you go for permanent solutions after executing these short term fixes.
How to stop a leaking pipe with water permanently
Now that you’ve learned all the short-term fixes. Finally it’s now time for you to learn how to stop a leaking pipe with water permanently. But these long-term solutions I’m about to show you are going to be much time consuming. It’s also going to need quite a considerable amount of experience on plumbing as well.
Be prepared to test your patients because you will be having a bit of trial and error moments. In case if this is the first time you are going to stop and fix a leaking pipe permanently. Get ready for some cutting, soldering and replacing. So it’s time to equip yourself with the solder flux, emery cloth/ cleaning rags, a torch and a fitting brush.
Take all the necessary measurements of the pipe that needs to be replaced and get to your local hardware Store and get all the plumbing material mentioned above in order to complete this job.
This time you need to completely remove all of the water inside the leaking pipe that needs to be replaced. Feel free to use an air compressor that has the ability to take out all the remaining water because, you don’t want to have any moisture inside or outside the pipe.
Now you can start cutting the cracked or leaking part of the pipe with the help of a hacksaw. Once you’re done cutting the defective part we can remove it out completely from the pipe.
Finally
Before doing any of the replacements. It’s time to use our emery cloth and fitting brush to polish both the inside and the outside of the new pipe. We are going to replace before we do the permanent fixing. But, it’s also important to clean both inside and outside surfaces of our old pipe. The same way as we did the new one since we will be soldering both of these together in a second.
This part it’s more about your patience as you will have to start carefully applying the soldering flux. With this one I will have to warn you that it is important you have some sort of experience before attempting this activity since you’ll be playing with fire.
Now that you have taken precautions and moving on, keep in mind to apply the soldering flux to each side we are about to solder. Now it’s almost done and it’s time to do the soldering of our new replacement pipe into the right place. After you have finished soldering, let it be there for a while to let it cool down on its own pace.
Lastly, turn the water back on and confirm to yourself that there are no leaks now that we have stopped a leaking pipe with water permanently.
You May Like: Pipe Dope Home Depot | Thread Lubricant | Plumbers Putty Home Depot